User Management
The User Management screen provides a comprehensive interface for managing users within the tenant. It allows administrators to view, invite, and manage user accounts, including their roles and status.
It is possible to have more than one administrator per tenant.
Overview
The screen is divided into three main sections:
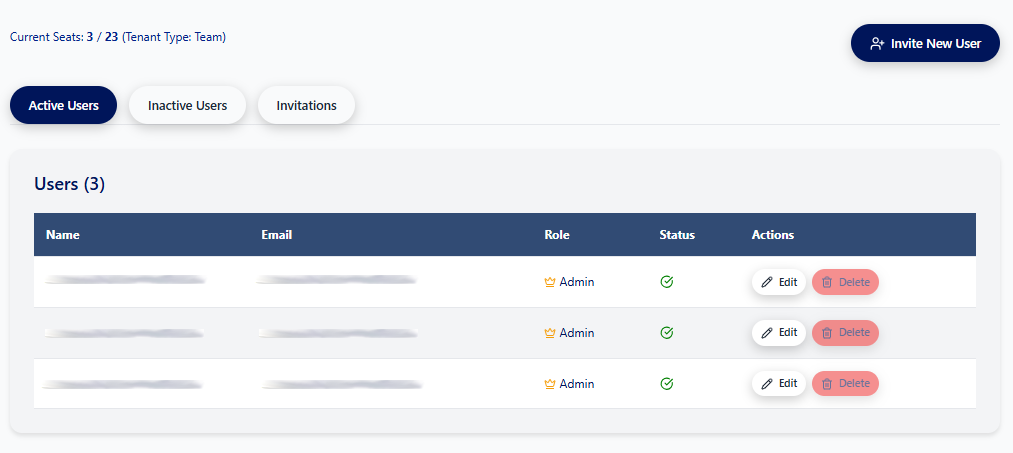
- Header: Displays tenant information and provides an option to invite new users.
- Action Buttons: Allows filtering users based on their status (Active, Inactive, Invited).
- Users Table: Lists the users with their details and provides actions to manage them.
There are two types of users: Admins and Standard users. Each tenant can have a mix of both. Admins (Administrators) are able to manage subscriptions, users and team settings, while Standard users cannot. When you sign up to Priset you will be assigned as an Admin for your tenant. If you purchase more than one license you will be able to invite other people into your tenant.
Header
The header section provides the following information and actions:
- Current Seats: Displays the number of seats currently occupied out of the total available seats for the tenant. It also shows the tenant type (e.g., Team).
- Invite New User Button: A prominent button that allows administrators to invite new users to the system. Clicking this button will open a dialog box to enter the new user's email address.
Action Buttons (Tabs)
The Action Buttons behave as tabs, allowing for easy filtering of users based on their status:
- Active Users: This is the default selected tab, which displays all users who are currently active in the tenant.
- Inactive Users: This tab lists users who have been deactivated and no longer have access to the tenant.
- Invitations: This tab shows a list of users who have been invited to join the tenant but have not yet accepted the invitation.
Users Table
The users table provides a detailed list of users based on the selected tab. The table includes the following columns:
- Name: The full name of the user.
- Email: The email address of the user, which is also used for logging in.
- Role: The role assigned to the user (e.g., Admin). The role determines the user's permissions and access level within the tenant.
- Status: Indicates whether the user is active or inactive. A green checkmark signifies an active user.
- Actions: Provides a set of actions that can be performed on a user account:
- Edit: Allows administrators to modify the user's details, such as their name or role.
- Delete: Permanently removes the user from the system. This action is typically irreversible and should be used with caution.